 Products Home
Optical Enclosures

- Black Hardboard, Aluminum, or Plexiglass Versions
- Shield Experiments from Environmental Variations
- Mountable on Solid Aluminum Breadboards
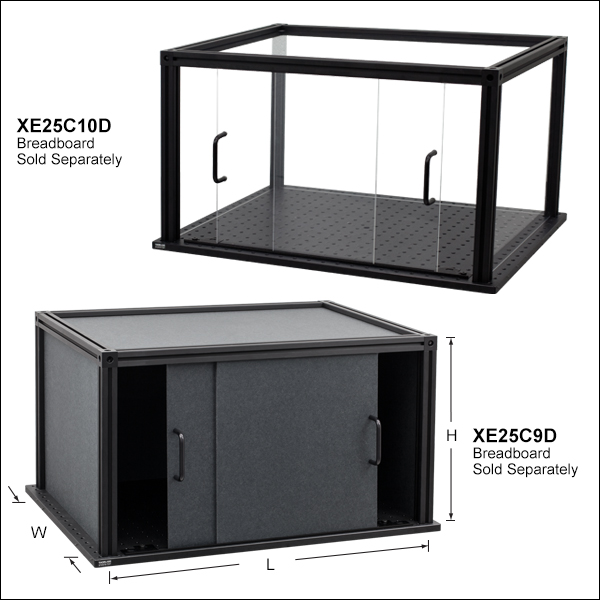
XE25C10D
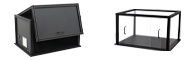
Plexiglass Panel Assembly with Sliding Doors
(Breadboard Sold Separately)
XE25C9
Black Hardboard Assembly (Breadboard Sold Separately)
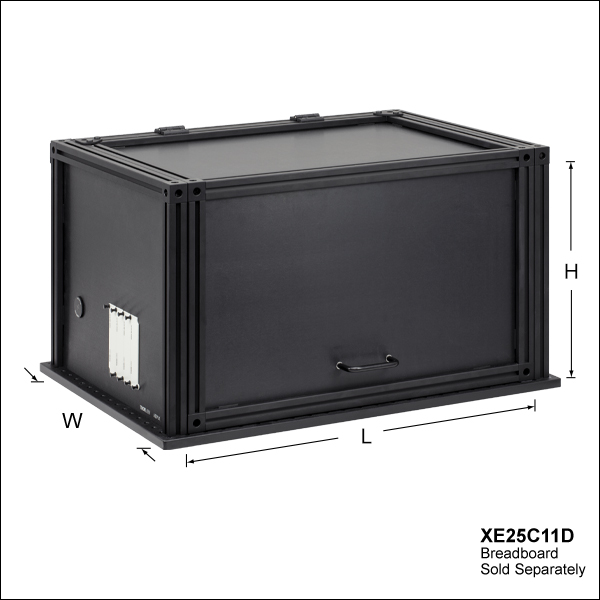
XE25C11D
Aluminum Enclosure with Hinged Door
(Breadboard Sold Separately)


Please Wait
| XE25 25 mm Construction Rail Accessories | ||||
|---|---|---|---|---|
 |
 |
 |
 |
 |
| Rails | Cubes and Brackets |
Breadboard Mounting |
Rail Joiners | Channel Insert |
 |
 |
 |
 |
|
| Construction Tools |
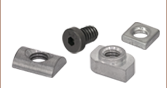
T-Nuts and Screws |
Enclosures | Enclosure Accessories |
|
| Quick Links |
|---|
| Black Hardboard Enclosures |
| Plexiglass Enclosure |
| Aluminum Enclosure |
| Enclosures with Sliding Doors |
| Enclosure with Hinged L-Door |
| Enclosure with Top-Opening Door |
Click for Details
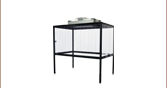
Custom enclosures can be built using our 25 mm rails and accessories above. The enclosure shown was constructed entirely from stock items.
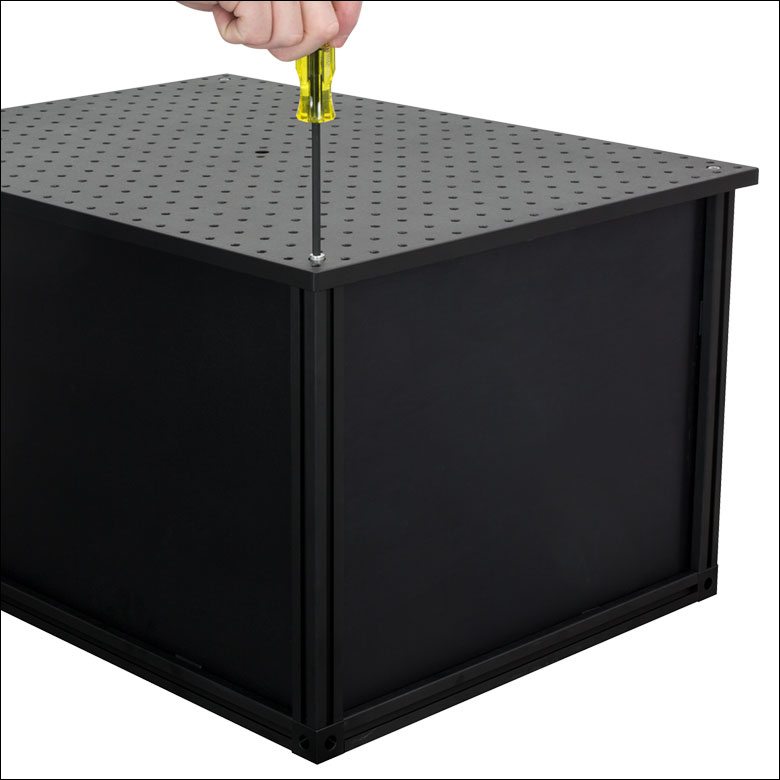
Click to Enlarge
Flip the Assembled Enclosure Upside Down to Install the Appropriate Breadboard
Features
- Enclosures Protect Setups from External Factors
- Choose from Three Versions
- Black Hardboard for Blocking Stray Light
- Plexiglass for Applications that Are Not Light Sensitive
- Aluminum for Blocking Stray Light and Added Durability
- Multiple Sizes Available
- 15" x 9" x 12" (375 mm x 225 mm x 300 mm)
- 21" x 9" x 12" (525 mm x 225 mm x 300 mm)
- 21" x 15" x 12" (525 mm x 375 mm x 300 mm)
- Designed to Mount on a Solid Aluminum Breadboard or Optical Table
- Optional Integrated Door Assemblies Allow Access to Interior
- Fully Customizable with Our Construction Tools and Enclosure Components and Accessories
- Custom Enclosures Available Upon Request
Thorlabs' optical enclosures provide a protected space for instruments that are sensitive to light and acoustic vibrations. Our enclosures are made from our 25 mm rails and feature panels made of black hardboard, anodized aluminum, or plexiglass, which are held in place by the rail channels. Laser safety panels made from acrylic are also available to enable visibility into enclosures without compromising safety. Each enclosure is designed with an internal height of 12" (300 mm) and is available in lengths and widths ranging from 9" to 21" (225 mm to 525 mm). They ship partially assembled and can be fully assembled using a 1/8" (4 mm) balldriver or hex key (not included). Like any assembly based on 25 mm rails, our enclosures are completely customizable using the parts shown in the Construction Rail Accessories table to the right. For more information on how to build your own enclosure, please see the Custom Enclosures tab.
Breadboard Mountable
To install the breadboard of the correct size, flip the assembled enclosure upside-down and screw in four 1/4"-20 (M6) cap screws using the counterbored holes at each corner of the breadboard (see the image to the right). The corners of our stock enclosures are designed such that the 1/4"-20 (M6) tapped holes in the rail ends align with the counterbored holes in select sizes of our Aluminum Breadboards; please consult the Suggested Breadboards tables below to ensure the proper match. The enclosures can also be attached directly to an optical table using our breadboard mounting accessories. If you need an enclosure for a particular size of breadboard, we suggest contacting Tech Sales to discuss our custom enclosure options.
Integrated Door Options
Select enclosures are also available with a door assembly to provide easy access to the interior. We offer a black hardboard enclosure and plexiglass enclosure with a set of overlapping sliding doors that sit in a bottom-located slide track, which attaches directly to the breadboard. The tops of the sliding panels fit into the rail channel of the upper rail. Aluminum enclosures with hinged doors allowing access through two panels or top-only are also available. Plastic handles are included with both the sliding doors and the hinged door. Tracks for sliding doors are not available separately; please contact Tech Sales to include sliding doors in your custom enclosure.
Thorlabs' accessories for assemblies made of 25 mm rails include corner cubes and brackets, T-Nuts, low-profile channel screws, breadboard mounting accessories, rail joiners, and a channel insert. In addition, we offer enclosure accessories, laser safety fabric panels, and "do-it-yourself" tools like taps, tap guides, and drill guides for home-built XE25-based constructions.
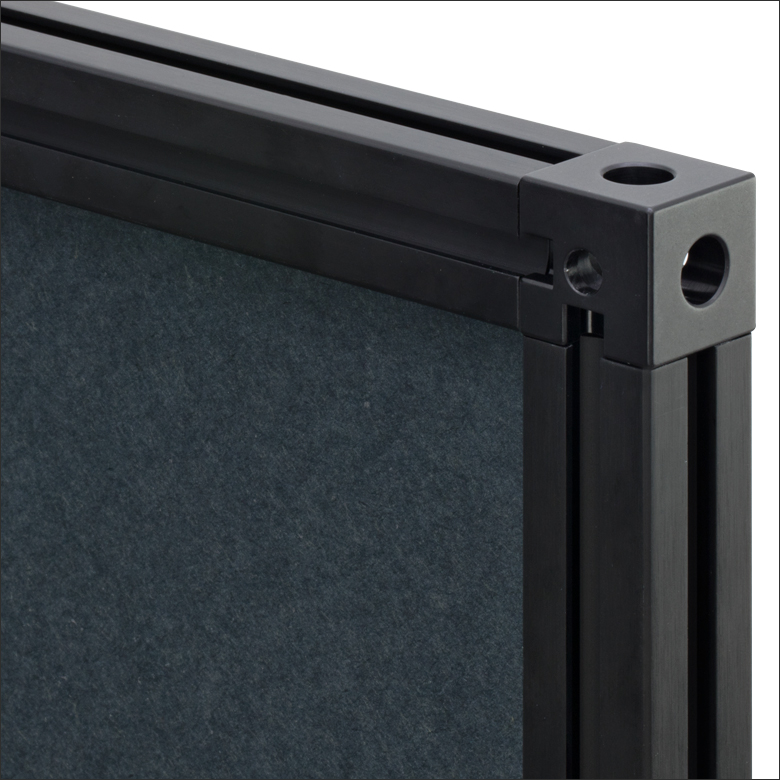
 Click to Enlarge
Home-Built 90° Corner
XE25 Construction Techniques
Thorlabs' XE25 rails and components are the building blocks for many types of modular systems, including custom enclosures. For the most demanding applications, Thorlabs recommends the "direct connection" technique for forming right angles with rails, detailed here.
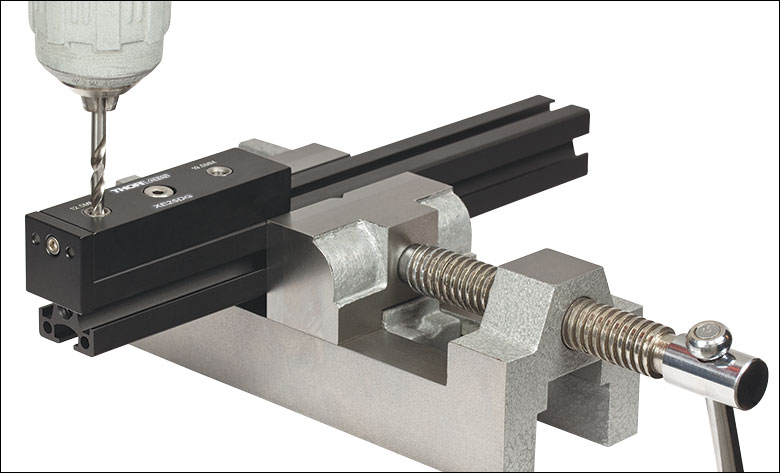
Step 1: Drill Side Holes
 Click to Enlarge
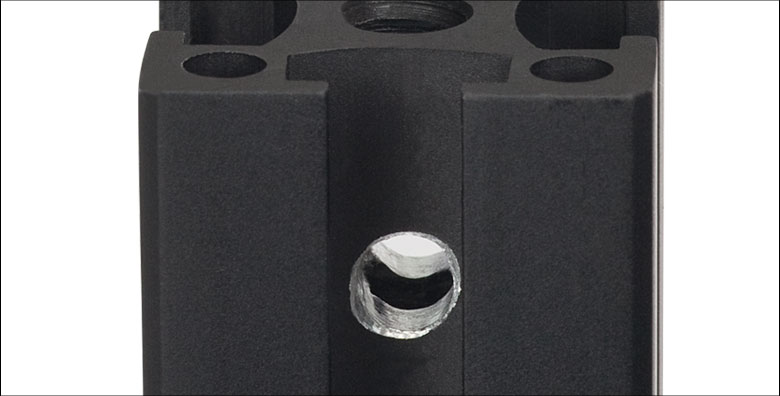 Click to Enlarge
A Ø4.6 mm hole in the end of one rail, as shown in the picture to the right, is needed to provide access for a 1/8" (4 mm) balldriver.
For this step, you will need the T119873 Ø4.6 mm Drill Bit, the XE25DG Drill Guide, a hand drill or drill press, and a vise.
The XE25DG drill guide is secured to the rail using the locking screw on top. A guide hole for the drill bit will be located 12.5 mm from the end of the rail. Now a hole can be drilled into the rail as shown in the figure to the left.
If your application requires a "three-way corner," such as that shown at the top of the page, you will have to drill a second hole in the rail at a 90° angle relative to the first hole.
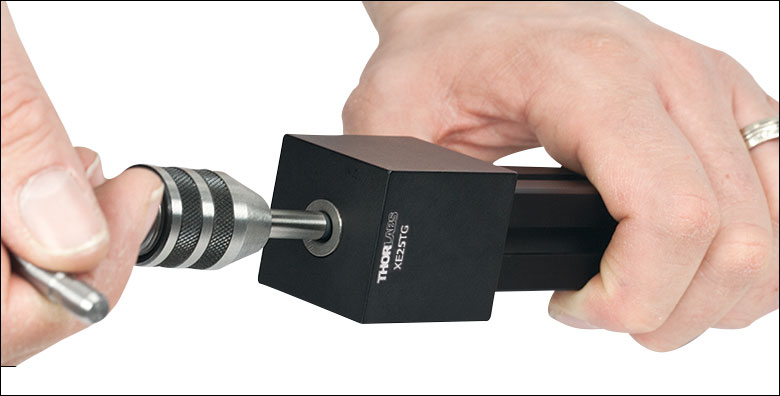
Step 2: Tap the Center Hole, If Necessary
 Click to Enlarge
All stock and custom-length anodized XE25 rails have a 1/4"-20 (M6) tapped hole in the end of the rail. If you have cut a standard XE25 rail, or are using the XE25RL2 Raw Extrusion, you will need to tap a hole into the end of the rail.
For this step, you will need the 71598 1/4"-20 Tap (or the 71498 M6 Tap), the XE25TG Tap Guide, and the TW25 Hand Tap Wrench.
Fix the tap inside the tap wrench. Place the tap guide block over the end of the rail. The hole in the top of the guide will keep the tap square with the hole and minimize the chance of misthreading. Turn the tap to thread the hole.
Step 3: Attach Low-Profile Channel Screw
 Click to Enlarge
For this step, you will need a SH25LP38 1/4"-20-threaded (SH6M10LP M6-threaded) Low-Profile Channel Screw and a 1/8" (4 mm) balldriver.
Insert the screw into the threaded hole in the end of the rail, and tighten down partway with the balldriver. If you are making a three-way connection, you will need to thread another channel screw into the end of a second rail.
Step 4: Join the Rails
 Click to Enlarge
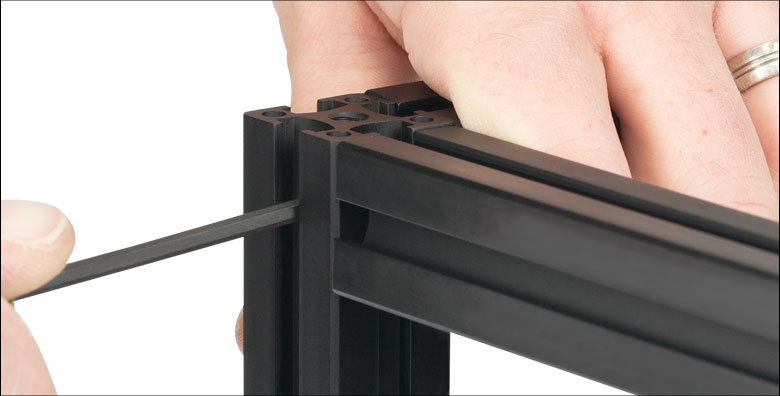 Click to Enlarge
Slide the head of the channel screw into the channel of the rail with the drilled holes, so that the hex head lines up with the hole. Insert the balldriver into the hole, and tighten the channel screw. If making a three-way connection, repeat this process with the third rail, as shown in the figure to the right.
For increased stability, the corners may be reinforced with the XE25A90 Right-Angle Bracket.
525 mm (L x W x H) enclosure with black hardboard panels. The parts needed for this custom enclosure are provided in the tables below.
Design a Custom Enclosure Using Thorlabs Components
With our vast selection of enclosure components, building your own DIY optical enclosure is simple. All our optical enclosure components, from panels to optical rails and corner cubes, can be purchased separately and customized to a size suitable for your application. For example, simple enclosures can be constructed to be as small as 1' x 1' x 1' (300 mm x 300 mm x 300 mm), whereas much larger enclosures are possible and might include hinged doors for easy access to an experiment. Enclosure components are designed to work together seamlessly, reducing the amount of time required during assembly.
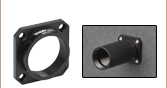
Any side or dimension of the enclosure can be modified to suit the requirements of your application. The black hardboard enclosure panels can be cut to the appropriate size or drilled to accommodate integrating optomechanical components, like lens tubes. Alternatively, black-anodized aluminum panels are available with pre-drilled slots, for fiber and electrical panels, and an SM1-threaded (1.035"-40) through hole.
Should you choose not to build your own DIY enclosure, we welcome the opportunity to work with you to provide a custom enclosure that meets your specific requirements. Customizable options include enclosure dimensions, like panel sizes and optical rails; panel material, like black hardboard or black-anodized aluminum; and number and configuration of doors. We will ensure the proper fit and function of the customized components. Once the custom enclosure meets specification, we will ship the components for customer assembly. Please note that aluminum breadboards are not included with our custom enclosures and that enclosures will need to be assembled by the customer.
If you would like consultation regarding whether to place a custom order or which components you need to purchase in order to assemble your own DIY optical enclosure, please contact Tech Sales.
Custom Enclosure Example
This section details how to construct a two-door enclosure with black hardboard panels, which is shown completely assembled in the bottom-right image. Watch the video above for step-by-step instructions on how to assemble this particular enclosure. The size of this enclosure is 1200 mm x 600 mm x 525 mm (L x W x H). Refer to the tables below for a complete parts list. The enclosure was constructed from metric components, but it can also be constructed using the imperial equivalent components.
Click for Details
Custom enclosures can be built using our 25 mm rails and accessories. This two-door enclosure was constructed entirely from stock items. The video above provides step-by-step instructions on how to assemble this enclosure.
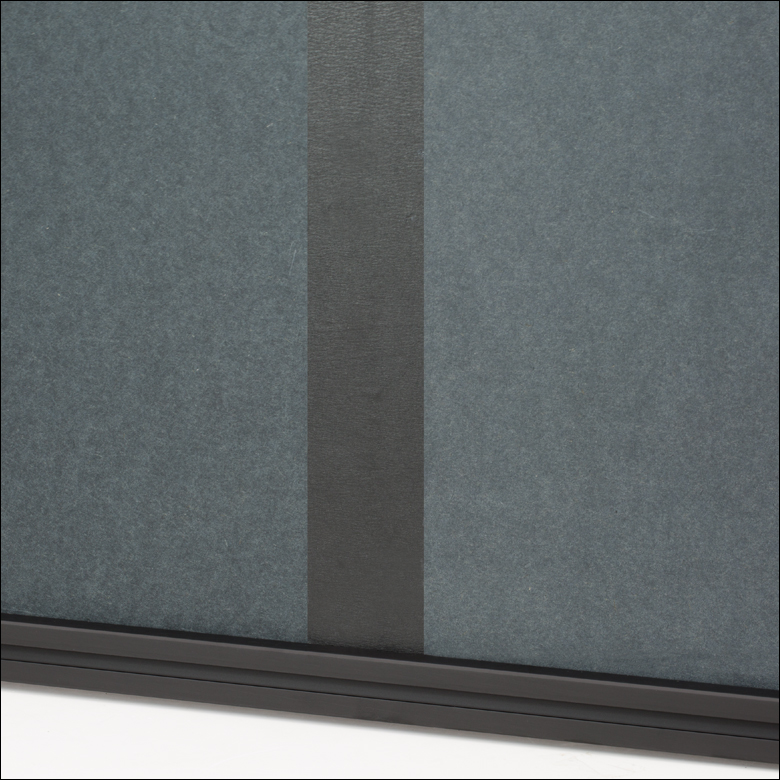
Click to Enlarge
Two TB4 hardboards (cut to the required height) can be taped together using T743-2.0 Black Masking Tape to form the back panel of the enclosure.
This enclosure was assembled on a 600 mm x 1200 mm aluminum breadboard (24" x 48" for imperial components), though other breadboard sizes are possible. The left and right doors are 500 mm and 600 mm (20" and 24") wide, respectively. Each door can be opened separately, allowing access to the breadboard inside the enclosure. We recommend building the doors and frame of the enclosure separately and then assembling them to complete the enclosure. The rails used in the doors and frame are connected via construction cubes with slotted corners, which help to prevent light leakage at the corners of the enclosure, and are secured using low-profile channel screws. Alternatively, for a faster solution, our quick corner cubes can be used. Our TB4 hardboard, which constitute the panels of the enclosure, can be cut to size using a utility knife; these pieces fit directly into the slots of the 25 mm rails and the counterbores of the cubes. The back panel is formed using two pieces of hardboard cut to the desired length and height and taped together using T743-2.0 Black Masking Tape (see the image to the right). Note that, for the imperial enclosure, black masking tape will also be needed to connect the 24" x 24" panels together along the sides and back of the enclosure.
A 25 mm rail is installed along the top of the enclosure to mount the doors and door hinges. This rail is attached by drilling through the top two frame rails; see the video above for details. For details on drilling and tapping a hole into the top frame rails for precise placement of the support rail, see the Construction Methods tab above.
The height of the enclosure can easily be customized to fit any application. For best results when adding doors to your enclosure, the total door height with connection cubes should match the enclosure height minus the bottom rails; otherwise, the door will overlap with the bottom rail. We recommend using 500 mm (20") and 525 mm (21") long rails for the door and enclosure, respectively.
For applications requiring a light-tight enclosure, our BFP1 black flocked self-adhesive paper can be used to seal gaps in the hinges of the enclosure.
| Posted Comments: | |
Jaeyoung Hong
(posted 2024-03-23 12:10:33.917) Hi, I was wondering if an aluminum enclosure system can be used as a Faraday cage. Is aluminum panel conductive and are all panels in the enclosure system electrically connected? Thank you. jdelia
(posted 2024-04-12 01:14:28.0) Thank you for contacting Thorlabs. We have not tested our aluminum enclosures for this. I have reached out to you directly to discuss the requirements of your application. Jana Preclikova
(posted 2024-03-15 14:39:51.19) Hi,
please, can you recommend me an interlock component, which stops the laser driver KLD101, when the box gets open?
Thanks,
Jana spolineni
(posted 2024-03-21 06:51:31.0) Thank you for reaching out with your query about an interlock component for your laser driver KLD101. I will contact you to understand your specific needs and assist you in setting up the interlock for your laser driver. user
(posted 2024-01-05 13:19:57.227) As far as I can see, you don't offer components that would allow a enclosure (on three sides + top/lid) on a small breadboard such as MB2025/M, do you? jpolaris
(posted 2024-01-05 07:28:40.0) Thank you for contacting Thorlabs. Requests for enclosures with custom dimensions that match a particular breadboard can be made by reaching out to us at techsupport@thorlabs.com. If you choose to reach out, it would be helpful if you included in your email information such as desired enclosure material type (hardboard, plexiglass, aluminum, etc.), whether or not you need bottom rails, internal and external dimensions, any doors needed, any sides to be left often, and so on. Gerhard Gruber
(posted 2022-06-29 00:52:46.987) I need an enclosure similar to XE25C11D_M, but only about 9" high, and eighter w/o the black hardboard panels, or - better - w/ panels, made of laser safety window T1E02.
1. is that available?
2. what are the costs?
best regards
Gerhard Gruber jdelia
(posted 2022-07-05 03:45:09.0) Thank you for contacting Thorlabs. We are unfortunately not able to provide an optical enclosure with laser safety windows. I have contacted you directly to discuss alternative options for your application. René Bauer
(posted 2022-03-02 11:03:32.27) I wasn´t aware, that this Enclosure has no bottom, a simple bottom, same as the walls would be enough for me. However, to link a breadboard that fits would be helpfull. jdelia
(posted 2022-03-02 01:42:18.0) Thank you for contacting Thorlabs. For the XE25C11D/M enclosure, our suggested breadboard is MB4560/M. The suggested breadboards can be found by scrolling down the "Overview" section of our Optical Enclosures product family page. Katherine Wood
(posted 2021-04-15 11:31:25.45) Dear Thorlabs,
Your optical enclosure stuff is great but one thing that would make everything a LOT easier is if you were to sell your black hardboards at 24.5" x 24.5" instead of 24"x24". Your standard longest rail is 24 inches, however you actually need a board 24.5" long to fit between a 24 inch rail since the board should fit inside the indentation of the rails. Thus, if you use the 24" rail, you have to cut up the boards and stick the bits back together with the black tape to make it long enough! Even 25x25" would be better since it would only then necessitate trimming off a bit rather than cutting up the boards.
Thanks!
Kath YLohia
(posted 2021-04-15 11:56:56.0) Hello Kath, thank you for your feedback! We're always looking to add new products to our catalog to assist our customers quickly and efficiently with their applications. We will consider adding this to our catalog in the future. Marc HUBERT
(posted 2019-09-19 10:13:37.31) Hello,
The doors on the example with metric component can't be closed. Indeed there are 4 cubes whose dimensions are 25.4mmx25.4mmx25.4mm and 1 600mm rail and 1 300mm rail. If you assemble these elements, the total lenght is 1201,6mm which is greater than the 1200mm rail.
To be sure to open and close the door, it's mandatory to reduce one of rail in order to insure sufficient gap between the rails. llamb
(posted 2019-09-26 02:46:38.0) Hello, thank you for your feedback. The metric-sized enclosure is confirmed to assemble and function properly with the metric parts list provided. The 1.6 mm difference in size that you have pointed out is not a concern when fully assembled. I have reached out to you directly to address any further concerns you may have. Vasco Tenner
(posted 2019-07-05 14:57:42.343) How can I mount the XE25C11/M on the adviced breadboard? Do I have to acces the bottomside of the breadboard for this?
How is this breadboard then mounted on an optical table? YLohia
(posted 2019-07-09 09:28:21.0) Hello, thank you for contacting Thorlabs. The vertical rails of the XE25C11/M would be mounted via the counterbored M6 holes located on the four corners of the breadboard. You may mount the breadboard to your table using a few CL5A clamps along the borders of the breadboard. Since there is not much room to work with along the borders of the breadboard, we recommend mounting the enclosure directly to the table using the XE25A90 right angle brackets. carsten.weinhold
(posted 2018-12-28 16:21:01.46) The "example custom enclosure" cannot be assembled as shown using TB4 panels - being 24inx24in these panels will not engage the channels of the 4 uprights as shown … the panel width would have to be about 24.5in for the sides, and about 24.25in for each of the two panels used in the back. llamb
(posted 2019-01-02 02:36:28.0) Thank you for your feedback and for pointing this out. The original enclosure was physically built using the metric parts list, in which the construction rails are slightly shorter than those of the imperial parts list. You are correct that for the imperial dimensions, the enclosure would ideally have >24" hardboard panels to allow enough panel material to fit inside the construction rails' grooves. This can be rectified by using blackout tape to tape panels together, like what must be done for the 48" x 21" back section. We are updating this webpage to better point out the need for taping panels together in the imperial parts list, so thank you again for bringing this to our attention. tbaker1
(posted 2018-06-20 17:51:19.16) What is the part number for the door rails? The description says sold separately, but it doesn't appear to be on the components page. Searching for "track" does not get any relevant results either. Thanks! mmcclure
(posted 2018-06-21 08:14:18.0) Hello, thank you for contacting Thorlabs. These enclosures incorporate our 25 mm optical rails, which are located here: https://www.thorlabs.com/newgrouppage9.cfm?objectgroup_id=194. Each enclosure available on this page includes the necessary components, including the optical rails, to assemble the enclosure; only the breadboard is sold separately. However, if you are constructing a custom enclosure for a particular setup, then you will need to purchase the individual components suitable for your setup. For more information about constructing custom enclosures, including an animation that shows an example enclosure being assembled with all the necessary components, please refer to the Custom Enclosures tab. richard.skilling
(posted 2014-10-01 11:41:48.11) Do you have a convenient way to couple beams (e.g. in beam tubes) in/out of these enclosures? R. jlow
(posted 2014-10-01 03:45:51.0) Response from Jeremy at Thorlabs: You could possibly use something like our SM1F1 (http://www.thorlabs.com/newgrouppage9.cfm?objectgroup_id=6791) adapter flange and put SM1 lens tubes on the enclosure. I will contact you directly to discuss about your application. user
(posted 2013-07-02 10:28:37.27) I may have missed something here, but we have just purchased a XE25C5D/M and the 2 sliding doors don't seem to fit into the sliding door guide rail? cdaly
(posted 2013-07-02 13:49:00.0) Response from Chris at Thorlabs: Thank you for using our feedback tool. This enclosure comes with two rails which are 52.5cm long. One of these is a standard rail having all four sides with the same extrusion profile, while the guide rail has one side which is different. Rather than having the standard opening which is only 0.26" across, it will have a larger 0.425" cutout to accommodate the doors. Please make sure this is the side you are trying to fit over the doors. If this does not solve your issue, please contact us at techsupport@thorlabs.com to further troubleshoot. habibi_esstt
(posted 2013-01-23 16:02:50.703) hello;
I want to know if I can order a "Enclosure with Plexiglass" as that displayed on the
website "XE25C6D / M - (L x W x H) 52.5 cm x 37.5 cm x 30 cm Plexiglass Sliding Door
Enclosure $ 230.00", but with the following dimensions: - (L x W x H) 150 cm x 70 cm x 80
cm. if possible, I want to have an invoice. tcohen
(posted 2012-03-23 09:33:00.0) Response from Tim at Thorlabs to Rizia: Thank you for your feedback! We are certainly able to provide custom enclosures. We have contacted you directly to get the information for your desired enclosure. rbardhan
(posted 2012-03-22 20:43:19.0) I would like to know if you would be able to design a custom enclosure for me with the specific dimensions I need. I would really appreciate of someone can contact me ASAP regarding this. Thanks Rizia bdada
(posted 2011-10-25 10:43:00.0) Response from Buki at Thorlabs:
Thank you for using our Web Feedback tool. We have contacted you to get the specifications for the custom breadboard enclosure you want. Please cotnact TechSupport@thorlabs.com if you have any questions. pak8
(posted 2011-10-24 06:47:28.0) could you please contact me about a custom breadboard enclosure. Thank you. jikim
(posted 2011-06-03 14:53:35.0) Could you provide a custamized version of XE25C3/M with a plexiglass instead of a black hardboard and a height of 15 cm instead of 30 cm? Thanks in advance. jjurado
(posted 2011-05-03 16:58:00.0) Response from Javier at Thorlabs to ldraghi: We will contact you shortly to get the details of your requirements. ldraghi
(posted 2011-05-03 15:37:12.0) Hello,
Can I please get into contact with someone about designing a custom enclosure? Thanks so much. jjurado
(posted 2011-04-18 13:19:00.0) Response from Javier at Thorlabs to gmp1g09: Thank you for your interest in our products. We can certainly offer customized enclosure systems. I will contact you directly to get your requirements. gmp1g09
(posted 2011-04-18 07:00:41.0) Is it possible to have custumised enclosures systems? jjurado
(posted 2011-03-28 18:01:00.0) Response from Javier at Thorlabs to sfpeen: Thank you very much for contacting us. We have not developed a new way for interfacing electrical connections with our enclosures. I will contact you directly for discussing ways to modify our current enclosure products to suit your needs. sfpeen
(posted 2011-03-25 16:56:32.0) You used to offer RBX components. Is there a new way to interface cables with the enclosures? bdada
(posted 2011-03-08 11:03:00.0) Response from Buki:
Thank you for your request. We will contact you to verify the details of the custom sized enclosure you need. tuttle.michael
(posted 2011-03-08 07:45:40.0) Am interested in a custom sized enclosure to fit breadboard PBI11112 (4x2.5). Height would be around 18" and a door would be necessary. Thorlabs
(posted 2010-08-17 17:58:52.0) Response from Javier at Thorlabs to japagan: Thank you for your feedback. Our enclosures are not designed to hold water or any other liquids. Their purpose is to provide a shield from ambient light, and to protect sensitive equipment from acoustic noise and thermal gradients. We do not offer any other products designed for holding liquids. I will contact you directly to discuss your application. japagan
(posted 2010-08-17 16:44:02.0) Will this product be able to hold water or other liquids. And if not do you have other products? Greg
(posted 2010-04-22 11:18:06.0) A response from Greg at Thorlabs: We previously sold panels that the RBX components interfaced with, but we no longer offer these. I have thus removed the RBX components from this web page. user
(posted 2010-04-21 16:57:41.0) There are lots of RBX series components shown on this page but no indication of how they interface into the enclosure system; please clarify. Greg
(posted 2009-02-12 16:21:51.0) A response from Greg at Thorlabs to harringt.sean: Yes, we do custom enclosures. A member of our Technical Support department will be in contact with you shortly to discuss your options. They will also be able to prepare a quote for you. harringt.sean
(posted 2009-02-12 15:46:50.0) Are the Enclosures sizes customizable? For our purposes we would need one that is roughly 12" x 55" x 30". Laurie
(posted 2008-12-23 08:38:08.0) Response from Laurie at Thorlabs to mmmonto: Thank you for your inquiry concerning blackout materials. We do offer hardboard to use with the XE25 rails. You can find it at this link: http://www.thorlabs.com/newgrouppage9.cfm?objectgroup_id=190&pn=TB4. Although the standard size offered is 2’ x 2’ x 5 mm thick (and you can cut and tape multiple sheets together to form larger sizes), you can also have custom lengths cut for you by contacting our technical support team. At this time, we do not offer panels made from static dissipative materials, but I will insert that idea into our internal forum. Thank you for your interest in our products, and please let us know if you have additional questions.
If you have additional questions, please feel free to contact me or a member of our technical support staff by dialing 973-300-3000 and asking to speak to an applications engineer.
Thank you for your interest in our products. mmmonto
(posted 2008-12-22 17:25:57.0) I am buidling a large light trap enclosure from your standard 48" XE25 rails. Do you offer black harboard panels for this size enclosure? Do you offer panels made from static dissipative materials? If not, can you provide a drawing for how you panels are cut to properly fit a stanard enclosure (i.e. width, thickness, and corner cuts)?
Thanks,
Mike |

 Zoom
ZoomIncluded Parts Lista
| Suggested Breadboards | |||
|---|---|---|---|
| Imperial Enclosure | Imperial Breadboard | Metric Enclosure | Metric Breadboard |
| XE25C7 | MB1218 | XE25C7/M | MB3045/M |
| XE25C8 | MB1224 | XE25C8/M | MB3060/M |
| XE25C9 | MB1824 | XE25C9/M | MB4560/M |
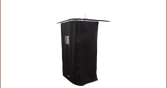
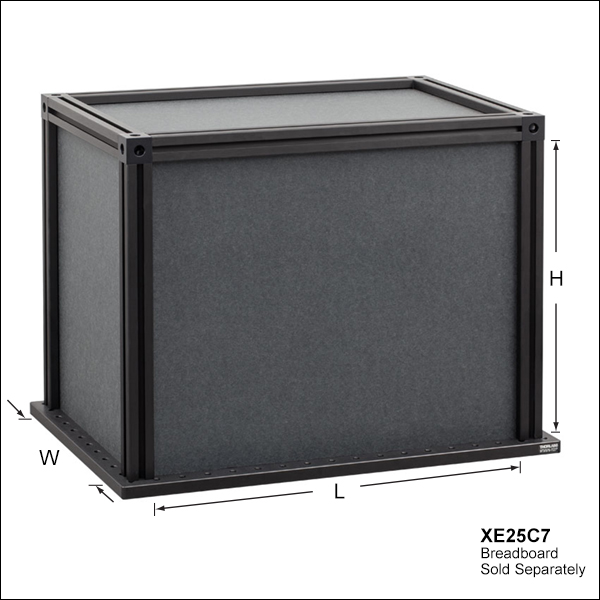
- TB4 Black Hardboard Blocks Stray Light
- Available in Three Sizes
- 15" x 9" x 12" (375 mm x 225 mm x 300 mm)
- 21" x 9" x 12" (525 mm x 225 mm x 300 mm)
- 21" x 15" x 12" (525 mm x 375 mm x 300 mm)
Our black hardboard enclosures are constructed from our TB4 enclosure panels to block stray light. All our stock enclosures are designed with an internal height of 12" (300 mm). The L x W x H dimensions given in the product descriptions below are specified for the enclosure interior. The roof is shipped preassembled; a 1/8" (4 mm) balldriver or hex key (not included) is required to complete the construction.
The corners of our stock enclosures are positioned such that the 1/4"-20 (M6) tapped holes in the rail ends align with the counterbores in our Aluminum Breadboards (sold separately). Please consult the Suggested Breadboards table to the right to ensure the proper match.
The side panels on these enclosures can be replaced with our aluminum enclosure panels. Additionally, a door kit compatible with the XE25C9(/M) can be purchased here.

 Zoom
ZoomIncluded Parts Lista
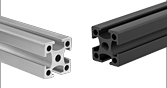
- XE25 25 mm Rails
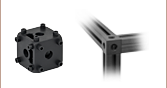
- RM1S Construction Cubes
- Plexiglass Panels
- Low-Profile Channel Screws
| Suggested Breadboards | |||
|---|---|---|---|
| Imperial Enclosure | Imperial Breadboard | Metric Enclosure | Metric Breadboard |
| XE25C10 | MB1824 | XE25C10/M | MB4560/M |
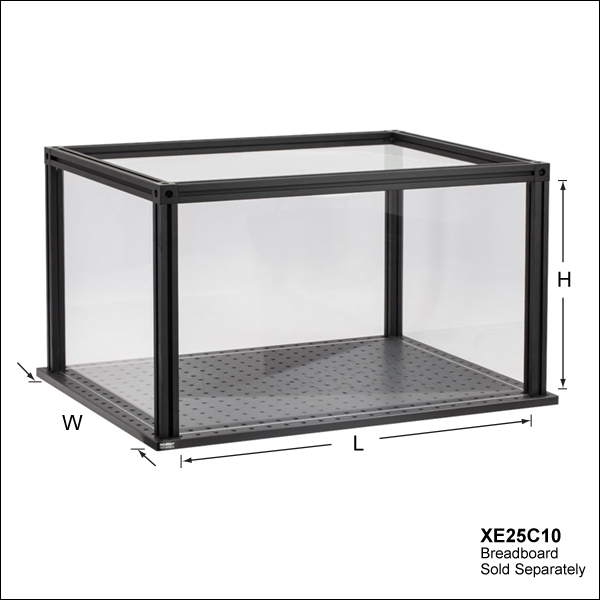
- Plexiglass for Non-Light Sensitive Applications
- 21" x 15" x 12" (525 mm x 375 mm x 300 mm)
Our transparent plexiglass enclosure is suited to applications that are not light sensitive. The enclosure is designed with an internal height of 12" (300 mm). The L x W x H dimensions given in the product descriptions below are specified for the enclosure interior. The roof is shipped preassembled; a 1/8" (4 mm) balldriver or hex key (not included) is required to complete the construction.
The corners of our stock enclosure is positioned such that the 1/4"-20 (M6) tapped holes in the rail ends align with the counterbores in our Aluminum Breadboards (sold separately). Please consult the Suggested Breadboards table to the right to ensure the proper match.
The side panels on this enclosure can be replaced with our aluminum enclosure panels.

 Zoom
ZoomIncluded Parts Lista
- XE25 25 mm Rails
- RM1S Construction Cubes
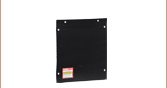
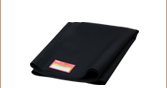
- Aluminum Panels (Including One AEPU1(/M) Utility Panel)
- Rubber Anti-Vibration Dampeners
- Low-Profile Channel Screws
| Suggested Breadboards | |||
|---|---|---|---|
| Imperial Enclosure | Imperial Breadboard | Metric Enclosure | Metric Breadboard |
| XE25C11 | MB1824 | XE25C11/M | MB4560/M |
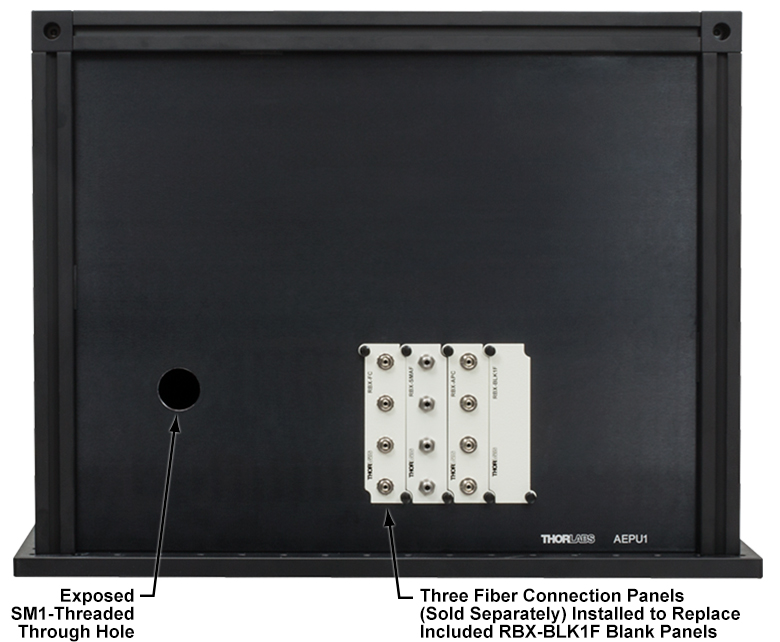
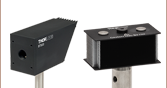
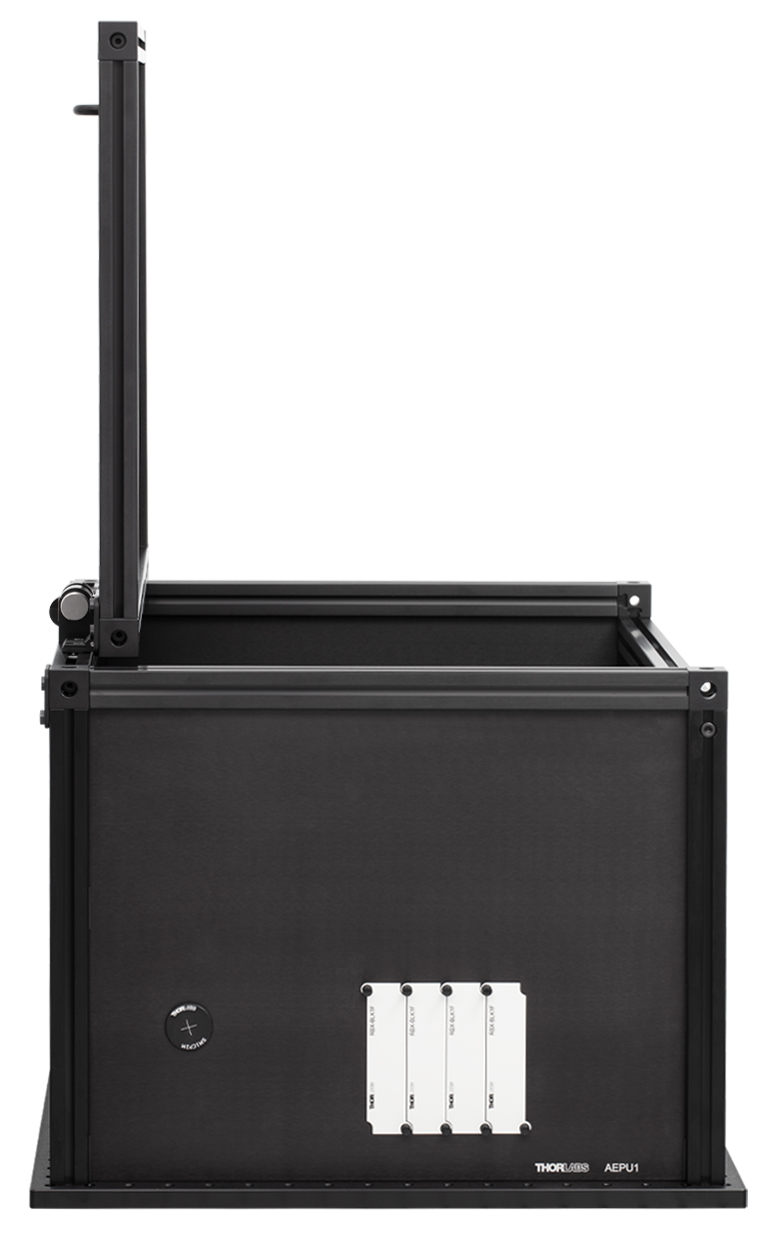
Click for Details
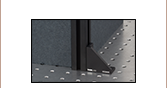
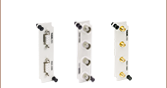
Side View Showing AEPU1 Utility Panel. Three blank connection panels have been replaced by fiber connection panels.
| Damage Threshold Specificationsa | |
|---|---|
| Pulsed | 0.50 J/cm2 (532 nm, 10 ns, 10 Hz, Ø0.504 mm, 200 shots) 0.90 J/cm2 (1064 nm, 10 ns, 10 Hz, Ø1.00 mm, 200 shots) |
| CW | 23.6 W/cm (532 nm, Ø1.00 mm, 60 s exposure) |
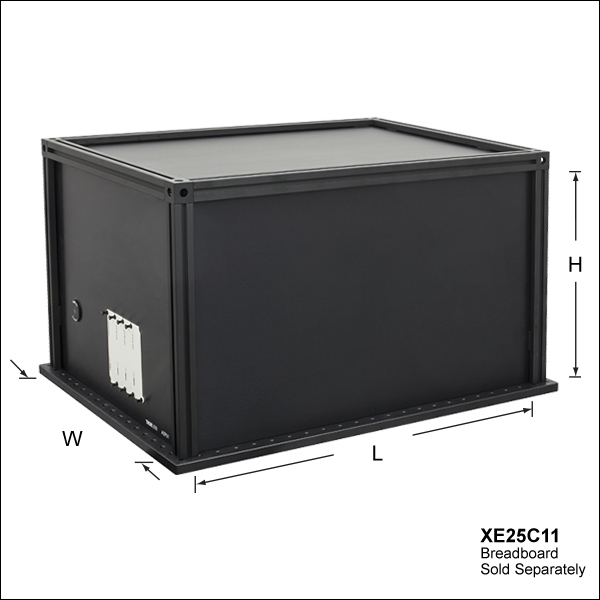
- Anodized Aluminum Enclosure
- 21" x 15" x 12" (525 mm x 375 mm x 300 mm)
- Rubber Anti-Vibration Dampeners Increase Stability
- One AEPU1(/M) Enclosure Utility Panel Included
Our black-anodized aluminum enclosure is a sturdier alternative to plexiglass or hardboard enclosures when using higher-powered lasers (see the Damage Threshold Specifications table below). However, aluminum enclosures should not be used as permanent beam dumps; if your setup requires a beam dump, see our selection of beam traps and beam blocks.
The enclosure is designed with an internal height of 12" (300 mm). The L x W x H dimensions given in the product descriptions below are specified for the enclosure interior. The roof is shipped preassembled; a 1/8" (4 mm) balldriver or hex key (not included) is required to complete the construction. Rubber anti-vibration dampeners surround each enclosure panel to increase durability and stability, eliminating rattling when the enclosure is moved.
The enclosure includes one AEPU1(/M) enclosure utility panel that features four RBX-BLK1F blank connection panels and one SM1-threaded (1.035"-40) through hole covered by a removable SM1CP2M end cap. The blank connection panels can be removed for easy installation of our fiber or electrical connection panels (see the image to the left). The SM1-threaded hole allows for a range of SM1-compatible components, like our lens tubes, to be installed.
The corners of the enclosure are positioned such that the 1/4"-20 (M6) tapped holes in the rail ends align with the counterbores in our Aluminum Breadboards (sold separately). Please consult the Suggested Breadboards table above and to the right to ensure the proper match.
We also offer a version of this aluminum enclosure with a hinged door, item # XE25C11D(/M), below.

 Zoom
ZoomIncluded Parts Lista
- XE25 25 mm Rails
- RM1S Construction Cubes
- Black Hardboard or Plexiglass Panels
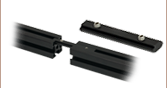
- XE25DK1(/M) Black Hardboard Sliding Door Kit or Plexiglass Sliding Door Kit
- Low-Profile Channel Screws
- Molded Plastic Hinges
- Door Handle
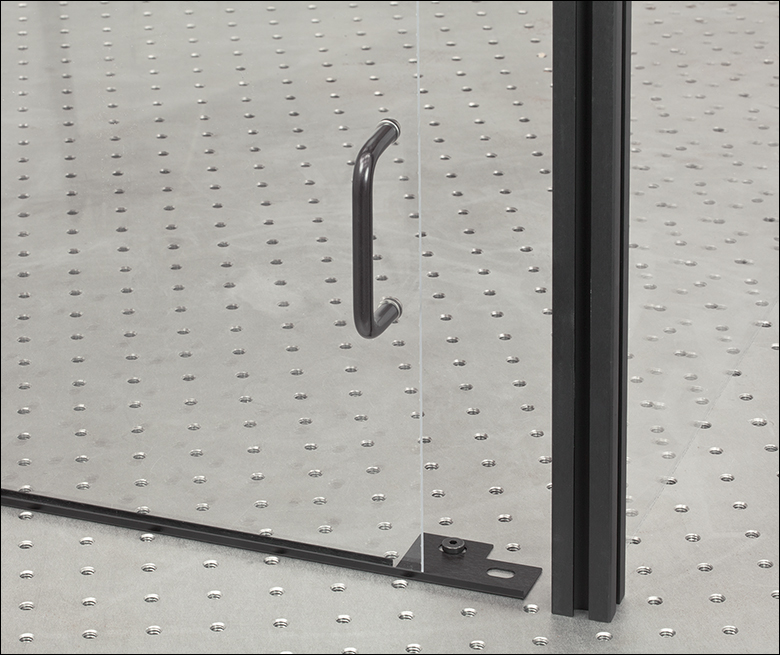
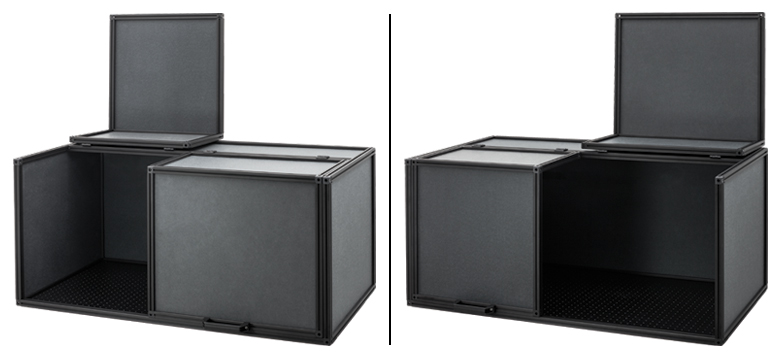
Click to Enlarge
Enclosures with doors feature
sliding tracks that attach
directly to the breadboard. The XE25C10D enclosure is shown.

Click to Enlarge
The doors on the XE25C9D(/M) enclosure have engraved dots to indicate the widened channels.
| Suggested Breadboards | |||
|---|---|---|---|
| Imperial Enclosure | Imperial Breadboard | Metric Enclosure | Metric Breadboard |
| XE25C9D | MB1824 | XE25C9D/M | MB4560/M |
| XE25C10D | MB1824 | XE25C10D/M | MB4560/M |
- Black Hardboard or Plexiglass Panels
- 21" x 15" x 12" (525 mm x 375 mm x 300 mm)
- Sliding Side Panels with Rigid Plastic Handles
Our enclosures with door assemblies feature black hardboard or plexiglass panels and a sliding door assembly on one side. This assembly consists of two overlapping doors with plastic handles that slide along the channel of the rail above and the track bolted to the breadboard underneath. Please note the doors in the XE25C9D(/M) enclosure include a widened channel, indicated by engraved dots, to allow for each panel to slide over the other; see the image to the far right.
These enclosures come complete with all the enclosure components necessary for construction (please note that the breadboard is not included). The roof is shipped preassembled, but note that a 1/8" (4 mm) balldriver or hex key (not included) is required to complete construction of the enclosure, and a 9/64" balldriver or hex key (not included) will be needed to attach the handles to the doors.
The corners of our stock enclosures are positioned such that the 1/4"-20 (M6) tapped holes in the rail ends align with the counterbores in our aluminum breadboards (sold separately). Please consult the Suggested Breadboards table to the right to ensure the proper match.
The side panels on these enclosures can be replaced with our aluminum enclosure panels. The black hardboard sliding door kit is also available separately [item # XE25DK1(/M)].

 Zoom
ZoomIncluded Parts Lista
- XE25 25 mm Rails
- RM1S Construction Cubes
- Aluminum Panels (Including One AEPU1(/M) Utility Panel)
- Top Panel with Pre-Attached Molded Plastic Hinges
- Rubber Anti-Vibration Dampeners
- Support Brackets
- Low-Profile Channel Screws
- Door Handle
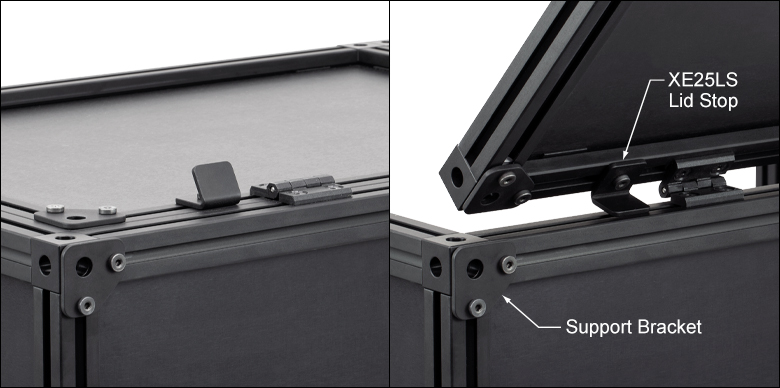
Click for Details
For hands-free access to the interior, use two XE25LS lid stops near opposite ends of the rail to support the door in the open position.
Click to Enlarge Open XE25C11D Enclosure with XE25GSK Door Opener Kit Installed
| Suggested Breadboards | |||
|---|---|---|---|
| Imperial Enclosure | Imperial Breadboard | Metric Enclosure | Metric Breadboard |
| XE25C11D | MB1824 | XE25C11D/M | MB4560/M |
| Damage Threshold Specificationsa | |
|---|---|
| Pulsed | 0.50 J/cm2 (532 nm, 10 ns, 10 Hz, Ø0.504 mm, 200 shots) 0.90 J/cm2 (1064 nm, 10 ns, 10 Hz, Ø1.00 mm, 200 shots) |
| CW | 23.6 W/cm (532 nm, Ø1.00 mm, 60 s exposure) |
- Anodized Aluminum Enclosure with Hinged Door
- 21" x 15" x 12" (525 mm x 375 mm x 300 mm)
- Rubber Anti-Vibration Dampeners Increase Stability
- One AEPU1(/M) Enclosure Utility Panel Included
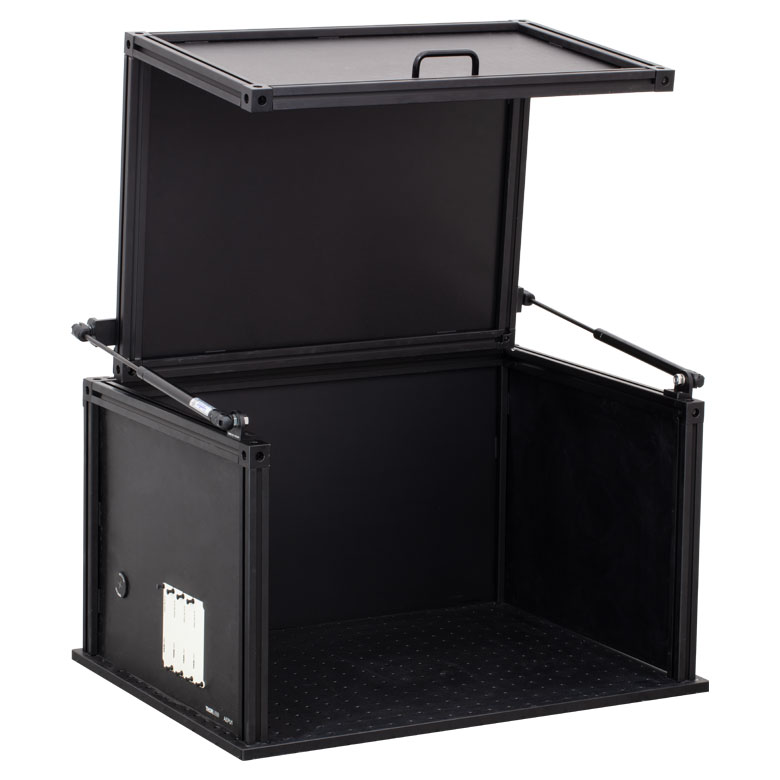
This black-anodized aluminum enclosure includes a hinged edge that allows the top and front panels to swing open, granting access to the interior. As with the XE25C11(/M) enclosure sold above, the aluminum construction provides a sturdier alternative to plexiglass or hardboard enclosures when using higher-powered lasers (see the Damage Threshold Specifications table below). Aluminum enclosures should not be used as permanent beam dumps; if your setup requires a beam dump, see our selection of beam traps and beam blocks.
The enclosure is designed with an internal volume of 21" x 15" x 12" (525 mm x 375 mm x 300 mm). The hinged top panel is shipped preassembled with the exception of the support brackets; a 1/8" (4 mm) balldriver or hex key (not included) is required to attach these brackets as well as the four side panels. Support brackets (included) should be added to the corners of the top and back panels, as shown in the image to the upper right, in order to stabilize the enclosure in the fully open position. Rubber anti-vibration dampeners (included) should be added to the edges of each enclosure panel to increase durability and stability and to eliminate rattling when the enclosure is moved.
We recommend installing two XE25LS lid stops (sold separately) on the back rail of the top panel in order to hold the enclosure door fully open. The lid stops can be installed using our T-nuts and low-profile screws in the rail channel. The image to the upper right shows an XE25LS lid stop near one end of the rail. For setups where a fully open door is not desired, we recommend the XE25GSK door opener kit (sold separately), which holds the door open at 90°, as seen in the image to the left. If space is at a premium, we recommend the XE25LB bracket (sold separately) to hold the lid of the enclosure open.
The enclosure includes one AEPU1(/M) utility panel that features four RBX-BLK1F blank connection panels and one SM1-threaded (1.035"-40) through hole covered by a removable SM1CP2M end cap. The blank connection panels can be removed for easy installation of our fiber or electrical connection panels. The SM1-threaded hole allows for a range of SM1-compatible components, like our Ø1" lens tubes, to be installed.
The corners of the enclosure are positioned such that the 1/4"-20 (M6) tapped holes in the rail ends align with the counterbores in our Aluminum Breadboards (sold separately). Please consult the Suggested Breadboards table above and to the right to ensure the proper match.

 Zoom
ZoomIncluded Parts Lista
- XE25 25 mm Rails
- RM1S Construction Cubes
- Aluminum Panels (Including One AEPU1(/M) Utility Panel)
- Top Panel with Pre-Attached Molded Plastic Hinges
- Rubber Anti-Vibration Dampeners
- Support Brackets
- Low-Profile Channel Screws
- Door Handle
Click for Details
For hands-free access to the interior, use two XE25LS lid stops near opposite ends of the rail to support the door in the open position.
Click to Enlarge Open XE25C11T Enclosure held open with XE25LB Locking Brackets
| Suggested Breadboards | |||
|---|---|---|---|
| Imperial Enclosure | Imperial Breadboard | Metric Enclosure | Metric Breadboard |
| XE25C11T | MB1824 | XE25C11T/M | MB4560/M |
| Damage Threshold Specificationsa | |
|---|---|
| Pulsed | 0.50 J/cm2 (532 nm, 10 ns, 10 Hz, Ø0.504 mm, 200 shots) 0.90 J/cm2 (1064 nm, 10 ns, 10 Hz, Ø1.00 mm, 200 shots) |
| CW | 23.6 W/cm (532 nm, Ø1.00 mm, 60 s exposure) |
- Anodized Aluminum Enclosure with Top-Opening Door
- 21" x 15" x 12" (525 mm x 375 mm x 300 mm)
- Rubber Anti-Vibration Dampeners Increase Stability
- One AEPU1(/M) Enclosure Utility Panel Included
This black-anodized aluminum enclosure includes a hinged edge that allows the top panel to swing open, granting access to the interior. As with the XE25C11(/M) enclosure sold above, the aluminum construction provides a sturdier alternative to plexiglass or hardboard enclosures when using higher-powered lasers (see the Damage Threshold Specifications table below and to the right). Aluminum enclosures should not be used as permanent beam dumps; if your setup requires a beam dump, see our selection of beam traps and beam blocks.
The enclosure is designed with an internal volume of 21" x 15" x 12" (525 mm x 375 mm x 300 mm). The hinged top panel is shipped preassembled; a 1/8" (4 mm) balldriver or hex key (not included) is required to attach the four side panels. Rubber anti-vibration dampeners (included) should be added to the edges of each enclosure panel to increase durability and stability and to eliminate rattling when the enclosure is moved.
We recommend installing two XE25LS lid stops (sold separately) on the back rail of the top panel in order to hold the enclosure door open at 120°. The lid stops can be installed using our T-nuts and low-profile screws in the rail channel. The image to the upper right shows an XE25LS lid stop near one end of the rail. For setups where a fully open door is not desired, we recommend the XE25GSK door opener kit (sold separately), which holds the door open at 90°. If space is at a premium, we recommend the XE25LB bracket (sold separately) to hold the lid of the enclosure open, as seen in the image to the left.
The enclosure includes one AEPU1(/M) utility panel that features four RBX-BLK1F blank connection panels and one SM1-threaded (1.035"-40) through hole covered by a removable SM1CP2M end cap. The blank connection panels can be removed for easy installation of our fiber or electrical connection panels. The SM1-threaded hole allows for a range of SM1-compatible components, like our Ø1" lens tubes, to be installed.
The corners of the enclosure are positioned such that the 1/4"-20 (M6) tapped holes in the rail ends align with the counterbores in our Aluminum Breadboards (sold separately). Please consult the Suggested Breadboards table above and to the right to ensure the proper match.