Compact Quick-Connect Goniometric Stages with Crossed-Roller Bearings
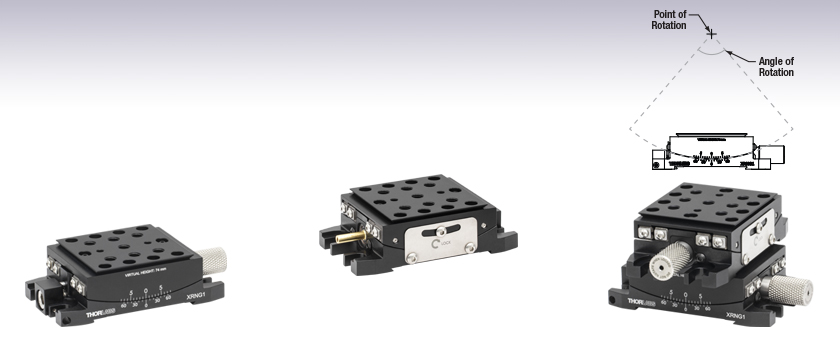
- ±8° Pure Rotational Motion About a Fixed Point Above the Stage
- Vernier Scale Provides 10 arcmin Resolution
- Integrated 2" Dovetails for Multi-Axis Construction
- Crossed-Roller Bearings for High Load Capacity,
Rigidity, and Stiffness
XRNG1
Single-Axis,
74 mm to Point of Rotation
XRNG2
Single-Axis,
50 mm to Point of Rotation
XRNG-K1
Dual-Axis,
50 mm to Point of Rotation,
±8° / ±8° Rotation
All goniometers feature
a fixed point of rotation
above the stage platform.
Front View
Back View,
Shown with Adjuster
Knob Removed

Please Wait
| Item # | XRNG2(/M) | XRNG1(/M) | XRNG-K1(/M) |
|---|---|---|---|
| Distance from Top Surface to Point of Rotation |
50.0 mm (1.97") |
74.0 mm (2.91") |
50.0 mm (1.97") |
| Rotation Range | ±8° | ±8° / ±8° | |
| Vernier Scale Resolution | 10 arcmin (0.167°) | ||
| Adj. Knob Revolution | 0.9°/rev (0.015 rad/rev) | ||
| Load Capacity | 3.5 lbs (1.59 kg) | 2.8 lbs (1.25 kg) | |
| Bearing Type | Crossed-Roller Bearings | ||
| Platform Mounting Features |
8-32 (M4 x 0.7), 5.08 mm Deep (2 Places) 1/4"-20 (M6 x 1.0), 7.6 mm Deep (7 Places) 2" Quick-Connect Dovetails |
||
| Platform Size | 2.00" x 2.00" (50.7 mm x 50.7 mm) | ||
| Platform Height (On Breadboard) |
1.02" (26.0 mm) | 1.97" (50.0 mm) | |
| Base Dimensions | 3.35" x 2.01" (85.0 mm x 51.0 mm)a | ||
| Base Mounting Features | 2" Quick-Connect Dovetails | ||
| Four Mounting Slots for 1/4"-20 (M6) Cap Screws | |||
| Weight (Mass) | 0.75 lbs (0.34 kg) | 1.5 lbs (0.68 kg) | |

Click to Enlarge
Beamsplitter Cube Mounted on Goniometric and Rotation Stages
Features
- Pure Rotational Motion About a Virtual Point
- Anti-Backlash Leadscrew Drive and Removable Adjuster Knob
- Crossed-Roller Bearings for High Load Capacity, Rigidity, and Stiffness
- Dual-Axis Versions Available
- Quickly Connect Stages and Accessories Using 2" Dovetails
- See the Quick-Connect Stages Tab for Complete Line of Components
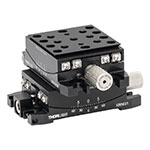
Thorlabs' XRNG Series Goniometers (or goniometric stages) provide ±8° of precise rotation about a fixed point in space. These goniometers use steel crossed-roller bearings to support precision motion and high load capacities. The top and bottom plates are machined from cast tool and jig aluminum for minimal internal stress and improved stability. The anti-backlash leadscrew drive and a vernier scale provide accurate and repeatable positioning. Stage rotation can be locked via a lock plate that accepts a 5/64" (2.0 mm) hex key or ball driver. The adjuster knob can be removed by loosening the setscrew on its shaft using a 0.05" hex key, reducing the overall length of stage for constrained setups. With the knob removed, the drive shaft can be actuated using a 5/64" (2.0 mm) hex key.
The distance from the mounting surface to the point of rotation is designed so that an XRNG2(/M) may be stacked on top of an XRNG1(/M) stage and both stages will rotate about the same point. The XRNG-K1(/M) dual-axis kit consists of two such complementary stages which must be connected by the user. The stages may be mounted directly to a table or breadboard, onto a baseplate, or onto another XRN series compact stage. Refer to the table to the right and to the diagrams below for details.
The top and bottom of each stage feature quick-connect dovetails (as shown in the lower right image) that allow for the construction of multi-axis systems without the need for additional hardware. The stages are secured by a single dovetail locking mechanism that can be actuated with a 3/16" (5 mm) hex key. The 2" dovetails on our XRNG series stages are directly compatible with the dovetails on the stages shown in the selection guide below. Additional functionality is provided by a complete line of accessories that include multi-axis assembly kits, rail carriers, a rotation adapter, and rails. An adapter plate is also available for mounting these compact stages with an integrated 2" dovetail onto translation and rotation stages with a 3" dovetail. For more information about our quick-connect construction components, see the Quick-Connect Stages tab.
Note: Using mounting hardware that exceeds the tap depth of the mounting holes will damage the stage. Before mounting components onto the goniometers, please review the mounting hole tap depths listed in the table above and on the support documents, accessible by clicking on the red Docs (![]() ) icon next to each Item # below.
) icon next to each Item # below.
Click to Enlarge
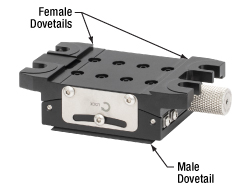
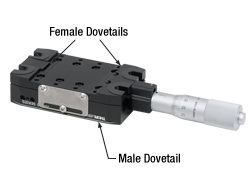
The 2" female dovetails on the bottom of the stage mate with the male dovetails on another stage to form multi-axis configurations. The left female dovetail is on a retractable clamping arm, allowing stages to be dropped into place.
Click to Enlarge
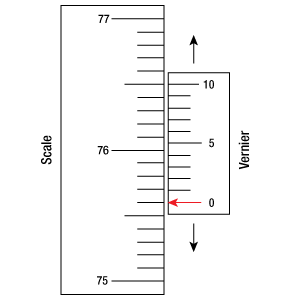
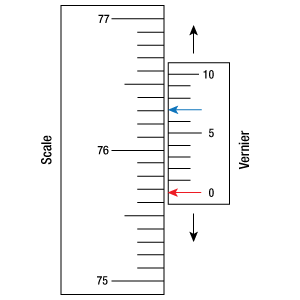
Figure 1: An example of how to read a vernier scale. The red arrow indicates what is known as the pointer. Since the tick mark labeled 10 on the vernier scale aligns with one of the tick marks on the main scale, this vernier scale is reading 75.60 (in whatever units the tool measures).
Reading a Vernier Scale
Vernier scales are typically used to add precision to standard, evenly divided scales (such as the scale on Thorlabs' rotation mounts). A vernier scale has found common use in many precision measurement tools, the most common being calipers and micrometers. The direct vernier scale uses two scales side-by-side: the main scale and the vernier scale. The vernier scale has a slightly smaller spacing between its tick marks (10% smaller than the main). Hence, the lines on the main scale will not line up with all the lines on the vernier scale. Only one line from the vernier scale will match well with one line of the main scale, and that is the trick to reading a vernier scale.
Figures 1 through 3 show a vernier scale system for three different situations. In each case, the scale on the left is the main scale, while the small scale on the right is the vernier scale. When reading a vernier scale, the main scale is used for the gross number, and the vernier scale gives the precision value. In this manner, a standard ruler or micrometer can become a precision tool.
The 0 on the vernier scale is the "pointer" (marked by a red arrow in Figs. 1 - 3) and will indicate the main scale reading. In Figure 1 we see the pointer is lined up directly with the 75.6 line. Notice that the only other vernier scale tick mark that lines up well with the main scale is 10. Since the vernier 0 lines up with the main scale’s 75.6, the reading from Figure 1 is 75.60 (in whatever units the tool measures in).
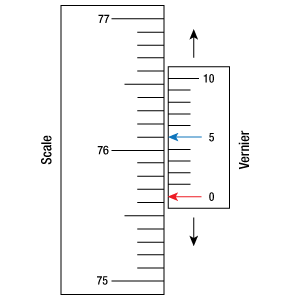
That is essentially all there is to reading a vernier scale. It's a very straightforward way of increasing the precision of a measurement tool. To expound, let’s look at Figure 2. Here we see that the pointer is no longer aligned with a scale line, instead it is slightly above 75.6, but below 75.7; thus the gross measurement is 75.6. The first vernier line that coincides with a main scale line is the 5, shown with a blue arrow. The vernier scale gives the final digit of precision; since the 5 is aligned to the main scale, the precision measurement for Figure 2 is 75.65.
Since the vernier scale is 10% smaller than the main scale, moving 1/10 of the main scale will align the next vernier marking. This asks the obvious question: what if the measurement is within the 1/10 precision of the vernier scale? Figure 3 shows just this. Again, the pointer line is in between 75.6 and 75.7, yielding the gross measurement of 75.6. If we look closely, we see that the vernier 7 (marked with a blue arrow) is very closely aligned to the main scale, giving a precision measurement of 75.67. However, the vernier 7 is very slightly above the main scale mark, and we can see that the vernier 8 (directly above 7) is slightly below its corresponding main scale mark. Hence, the scale on Figure 3 could be read as 75.673 ± 0.002. A reading error of about 0.002 would be appropriate for this tool.
As we've seen here, vernier scales add precision to a standard scale measurement. While it takes a bit of getting used to, with a little practice, reading these scales is fairly straightforward. All vernier scales, direct or retrograde, are read in the same fashion.
Click to Enlarge
Figure 2: An Example of a vernier scale. The red arrow indicates the pointer and the blue arrow indicates the vernier line that matches the main scale. This scale reads 75.65.
Click to Enlarge
Figure 3: An Example of a vernier scale. The red arrow indicates the pointer and the blue arrow indicates the vernier line that matches the main scale. This scale reads 75.67, but can be accurately read as 75.673 ± 0.002.
| Posted Comments: | |
| No Comments Posted |
Build Multi-Axis Configurations
Click for Details
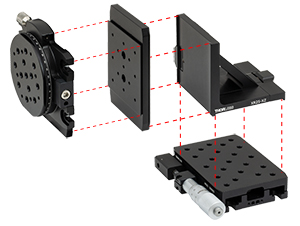
Z-axis assembly kits allow stages to be mounted in vertical orientations.
Quick-Connect Dovetails
Click to Enlarge
The female dovetails on the bottom of one stage mate with the male dovetails on another.
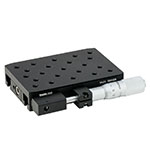
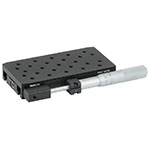
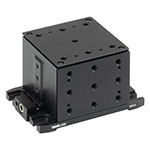
XR & XRN Dovetail Stages and Accessories
Our XR series manual stages feature quick-connect dovetails that allow for the construction of multi-axis systems without the need for additional hardware. The common dovetail feature with a single locking clamp makes it quick and simple to swap parts in and out while preserving excellent orthogonality.
Our selection of products with a quick-connect dovetail includes:
- Linear Translation Stages:
- Stackable 1-Axis Stages
- Pre-Assembled 2- and 3-Axis Configurations
- Rotational Stages:
- 360° Flat Rotation
- Tip/Tilt Goniometers
- Adapters:
- Z-Axis Assembly Kits
- Parallel and Perpendicular Mounting between 2" and 3" Dovetails
- Rail Accessories:
- Stationary Mounting Platforms
- Rail Component Positioners
- Base Plates and Rails
Most items are available in compact (2" dovetail) and full-size (3" dovetail) varieties. Adapters are available to interface between the two sizes. See the tables below for all available options.
| Linear Translation Stages | |||||
|---|---|---|---|---|---|
| Click Photo to Enlarge |  |
 |
 |
 |
 |
| Items | Compact 25 mm Stages | Compact 9 mm Vertical Stage | Full-Size 25 mm Stages | Full-Size 50 mm Stages | 14 mm Vertical Stage |
| Motion | X, Y, Z, XY, XZ, YZ, XYZ | Z (Vertical) | X, Y, Z, XY, XZ, YZ, XYZ | X, Y, Z, XY, XZ, YZ, XYZ | Z (Vertical) |
| Quick-Connect Dovetail | 2" Dovetail | 3" Dovetail | |||
| Additional Features | |||||
| Rotation and Goniometric Stages | |||
|---|---|---|---|
| Click Photo to Enlarge | 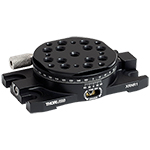 |
 |
 |
| Items | Compact Rotation Stage | Compact Goniometric Stages | Full-Size Rotation Stage |
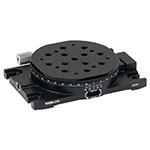
| Motion | 360° Rotation | ±8° Tip/Tilt About Fixed Point Above Stage | 360° Rotation |
| Quick-Connect Dovetail | 2" Dovetail | 3" Dovetail | |
| Additional Features | |||
| Stage Adapters | ||
|---|---|---|
| Z-Axis Assembly Kits |  |
 |
| Compact Z-Axis Assembly Kits, 2" Dovetails |
Full-Size Z-Axis Assembly Kits, 3" Dovetails |
|
| Parallel Mounting Adapters |
 |
 |
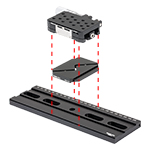
| Parallel Mounting Adapter, Male 2" Dovetail to Female 3" Dovetail |
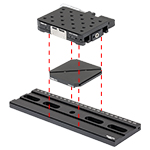
Parallel Mounting Adapter, Male 3" Dovetail to Female 3" Dovetail |
|
| Perpendicular Mounting Adapter |
 |
|
| Perpendicular Mounting Adapter Male 2" Dovetail to Female 3" Dovetail | ||
| Dovetail Accessories | ||
|---|---|---|
| Mounting Platforms |  |
 |
| 2" Mounting Platforms | 3" Mounting Platforms | |
| Rail Positioners |  |
 |
| 2" Rail Positioners | 3" Rail Positioners | |
| Dovetail Bases | |||
|---|---|---|---|
| Base Plates |  |
 |
|
| 2" Dovetail Base Plate | 3" Dovetail Base Plate with Rotational Adjustment | ||
| Rails / Extended Bases |
 |
 |
|
| 2" Dovetail Rails | 3" Dovetail Rails | ||

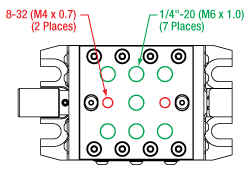
Click for Details
Mounting Features
This diagram shows a single-axis goniometric stage; dual-axis stages have the same mounting features. Dimensions in parentheses are for metric stages.
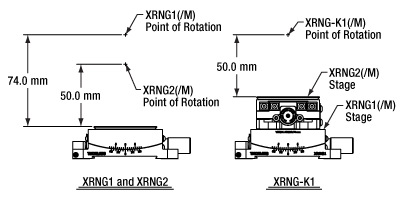
Click for Details
Goniometer Dimensions

- Kits Consist of Angle Bracket and Mounting Plate
- Support Vertical Mounting Configurations
- Compatible with 2" Mating Dovetail Stages
- Dovetail Clamp Screw has a Max Torque of 15 in•lbs
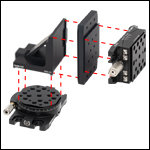
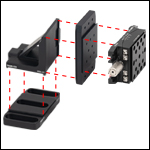
The XRN-XZ(/M) and XRN-YZ(/M) Assembly Kits enable vertical mounting of an XRNG Series Goniometric Stage. These assembly kits can be directly mounted onto a base plate or onto other stages with 2" mating dovetails, as illustrated in the photos to the right. When used to mount a goniometric stage vertically on a linear translation stage, the XRN-XZ kit positions the surface of the goniometer (at 0°) parallel to the direction of linear motion, while the XRN-YZ kit would orient the goniometric stage platform perpendicular to the direction of motion.
Each kit includes an angle bracket and a mounting plate. The female dovetail on the vertical stage attaches to one of the mounting plate's male dovetails. The mounting plate's other male dovetail is then mated to an arm of the angle bracket. The other arm of the angle bracket attaches to the base plate or horizontal stage.

| Mounting Adapter Compatibility | |||
|---|---|---|---|
| Item # | Orientation | Top Component | Bottom Component |
| XRN-A1 | Perpendicular | XRN25 Series XRNV1 Series XRNR1 Series XRNG1 Series |
XR25 Series XR50 Series XRR1 Series XRV1 Series |
| XRN-A2 | Parallel | ||
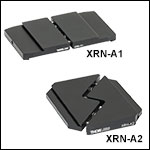
- XRN-A1 Adapter Enables Perpendicular Mounting of 2" Dovetail Components onto 3" Dovetail Components
- XRN-A2 Adapter Enables Parallel Mounting of 2" Dovetail Components onto 3" Dovetail Components
- Adapters Add 0.275" (7.0 mm) to the Overall Stacked Height of Components
These adapters enable mounting of quick-connect, crossed-roller bearing stages or accessories with a female 2" dovetail to components with a male 3" dovetail, as illustrated in the photos below. The XRN-A1 adapter enables perpendicular mounting while the XRN-A2 enable parallel mounting. The second photo below illustrates a parallel mounting configuration with a smaller footprint.
To assemble, first loosen the dovetail locking screw on the end of the top stage or accessory. Position the adapter on the bottom stage or rail, as illustrated in the photos below, then align the top component on the adapter. Lastly, tighten the dovetail locking screw (maximum torque: 15 in•lbs) on the end of the top component until the entire assembly is secure. Please note that the deep-set screws in the sides of the adapter are not user adjustable.

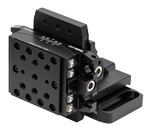
Click to Enlarge
Stages can be mounted vertically using a vertical assembly kit and the XRN-B1 base plate.
- 1.26" Long, 1/4" (M6) Counterbored Slots for Additional Mounting Flexibility
- Orthogonal Male Dovetails for Two Stage Mounting Orientations
- Compatible with 2" Mating Dovetail Stages
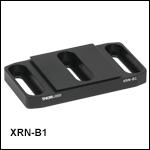
The XRN-B1(/M) baseplate offers additional mounting flexibility for coarse positioning of the XRNG series goniometric stages within a setup. Three 1.26" long, 1/4" (M6) counterbored slots allow for coarse translation adjustment of the stage. The orthogonal dovetails on the top of the base plate allow the stage to be mounted in two orientations. The middle slot is designed to be secured by two 1/4"-20 (M6) cap screws onto an optical table or breadboard, which allows the stage to be aligned with the table's or breadboard's hole pattern.
Vertical Stage Configuration
For situations where a vertically mounted rotation stage is needed, either the XRN-XZ or the XRN-YZ angle bracket (sold above) can be secured directly to the baseplate. This configuration is illustrated in the photo to the right and described in more detail in the Vertical Stage Assembly Kits section above.
 Products Home


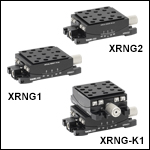
 Zoom
Zoom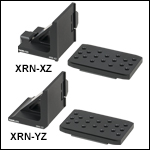
 1- and 2-Axis Goniometers, Crossed-Roller Bearings